Friday, July 11, 2008

Miracle Lotion

Miracle Lotion Recipe


Thanks to several hgtv crafters for this amazing recipe! It’ll work wonders on your dry cracked skin!

You will need:

1 jar of vitamin E cream
1 jar of petroleum jelly
1 bottle of baby lotion (or any favorite scent)

In a good sized deep bowl mix all the ingredients together with an electric mixer. Now you’re ready to put it in containers.


Some crafty suggestions from our talented bunch:

*For getting the lotion into the containers try using a small funnel or filling a plastic bag and cutting off a corner to squeeze it in.

*A few ideas for containers we’ve come up with are baby food jars, travel size bottles, left over hand pump soap bottles, just about any decorative bottle you can find!

Here are a few bottle ideas shared by our crafty hgtv friends:


The best part about this lotion is that all the ingredients (and probably even the containers) can all be bought at your local dollar store!!

Fork Bow

Many thanks to "one happy bird" for this tut~
Fork Bow Tutorial

I made this fork bow tutorial for you. It's very easy and makes cute little bows that can be tied to favors, small earring boxes, homemade Christmas ornaments and more! I used an old, big serving fork to demonstrate, but you can use a regular size fork or dowels glued on a wooden base.


Picture 1 Below: All you need is some kind of 4 pronged fork, ribbon and a pair of scissors.


Picture 2 Below: First off, start by weaving the ribbon in and out of the fork. Leave a little extra ribbon on the left and just let it lie there. The ribbon you will be weaving with is pictured on the right.


Picture 3 Below: Take the ribbon on the right hand side over the top of the fork and weave the ribbon in and out.


Picture 4 Below: Then, do the same thing again on the left hand side of the fork, weaving the ribbon in and out, coming the opposite direction. Remember, you are only weaving with the one ribbon. The other piece of ribbon on the left is just going to lie there.


Picture 5 Below: Now, finish weaving in and out until you almost reach the top of the fork.


Picture 6 Below: Take a separate piece of ribbon and slide it through the bottom in the middle of the fork.


Picture 7 Below: Now, tie it tight! Slide the whole thing off the fork.


Picture 8 Below: You should have 4 ribbon strings on the bow. Cut two of the pieces to look like part of the ribbon. The other two pieces of ribbon that are left can be tied around a little sachet-like favor.

You can actually do a multitude of projects with this little bow. I just gave one example when I mentioned party favors. ~one happy bird

Saturday, December 29, 2007

Posting a Link

Thanks to tmarie for creating this much needed tutorial!

For those who need to know how to post a link:

1) Go to the Web page you wish to link.

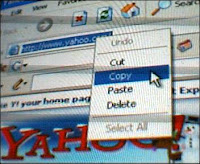
2) Put your arrow in your browser's address/location box at the top of the screen.
pic1


3) Left click your mouse (the box turns from white to blue).
pic2


4) Right click your mouse.5) Left click on "Copy" from the pop-up menu.
pic3


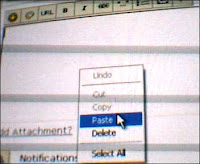
6) Go to the reply section of the post where you wish to insert the link.7) Right click your mouse. and click on paste
pic4


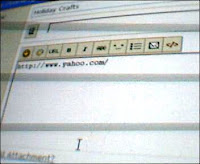
It should look like this after pasting..* soemtimes the http address will have a bunch of strange and very long run of numbers.
pic5


8) Type whatever you wish to say in the "Comments" box then post it!

Sunday, November 18, 2007

Snow Globe Card


Snow Globe Card by Mugsy


Supplies:
card blank
cardstock
patterned paper if desired
stamped image or clip art
i used a colluzzle, but you can just cut out the shape/hole with scissors
adhesive tape
clear glitter
packing tape (clear)


1. Cut the oval using colluzzle....nested shapes are great when you want to make another cut in a tad larger size:


2. Cut next larger oval from patterned paper :


3. Tape goes on the inside of the front....sticky side OUT:


4. Sticky side is now facing you:


5. Pour on clear or semiclear glitter to coat the sticky stuff:


6. stamped image (you can use your imagination here, so many possiblities) but it must be pretty vibrant or else you wont be able to see anything thru the glitter layer:


7. Taped it to card :


8. Image showing thru :

9. Placed the patterned paper to make a frame...not necessary though :


10. Front is done ! quick and easy project and quite effective
*You can also just do a card front in the technique and then attach that to the card...then you dont have to cover/hide the taping on the back of the card front

Saturday, September 29, 2007

Turkey Wreath


Turkey Wreath by shysue

You will need two soda cans for this project. Cut through the rim of the first can at the opening
Pic #1
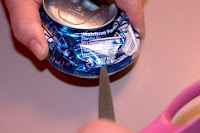
When you have cut through the rim, measure three inches from the bottom of the can and mark a line around the can if you like.
Pic #2
Cut around the entire can
Pic #3
Trim edges of can and dispose of the top
Pic #4
Cut the can in half lengthwise. Trim up edges.
Pic #5
Cut eight cuts from cut edge to bottom of can to make feathers
Pic #6
Bend the feathers back like the picture. I have to lightly step on the bottom of the can to do this. Pic #7
You will spray paint now before hot glueing feather sections together.(Mine are not painted in picture, but everything should be painted before glueing.)
Pic #8
Take your second can and mash it together. Again, I have to step or stomp on it.
Pic #9
Before you spray paint it, you need to figure where your neck piece will go and make a hole for it with a craft knife or scissors. You will also need to make two holes for the legs to be glued into it. The end with the opening will be in the back.
Pic #10
For neck you need a 2 1/2 in. twig-paint brown. Legs...two 2 1/2 in twigs-paint yellow with two black lines at knees. Head...one bottle cap-paint brown.
Pic #11
Cut craft foam for feet, wattle, and beak in appropriate colors or paint them. Use a 1/8 in. hole punch for two foam eyes. Use a marker to make eye pupils, toenails, and beak hole. Enlarge these pattern pieces to use or free hand your own.
Pic #12
Hot glue feather piece to back of body, head to neck, neck into body, feet onto legs, legs into body. Use craft glue to glue on face pieces. You can make a sign "Eat More Pork" to go around one of the turkey's neck if you want.
Pic #13
*DO NOT take photos/directions from this site and post elsewhere without permission from the author!! You may link to this site, but please don't take credit for another person's work. ALL lessons are the author's copyrighted property and not intended for mass marketing.Thank you, & have fun crafting!

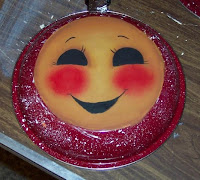
Gingy Pan by CJ's Crafts


I have a few pics so please be patient. This is the set up for the first set....splattering. Do not remove the label on the pan until after splattering:
Pic #1


Splattered skillet:
Pic #2


Using the same paint you splattered with, base in the bottom of the skillet:
Pic #3


Now base in using honey brown until you get a solid color :
Pic #4


Dry brush highlight in center, fading to edge. I used Yellow Ocher:
Pic #5


Dry brush cheeks in using bright red:
Pic #6


Sketch eye shapes over cheeks and shade. Also shade around outside of circle:
Pic # 7


Sketch mouth now and paint mouth, eyes and eyebrows black:
Pic # 8


Add nose in spiced apple and shade under it:
Pic # 9


Add white highlights. I also shaded under mouth to make his lip:
Pic #10


Using burnt umber,and a liner brush. Paint in halo of twigs:
Pic #11


I did one stroke, but the leaves could just be painted on in one color. Then add berries using a stylus:
Pic #12


He is done. I use Triple Thick Crystal Clear Glaze and seal the entire backside of the pan, including the spattered parts. Tear some coordinating homespun and wrap handle. Finish off with a bow. And you are done!


*Tips
I found those skillets at the Dollar Tree

I splatter the edges with enamel, then using a flat brush, paint the face circle. The enamel adheres to the pan, the acrylics then will adhere to the enamel. Then the face is painted with acrylics


*DO NOT take photos/directions from this site and post elsewhere without permission from the author!! You may link to this site, but please don't take credit for another person's work. ALL lessons are the author's copyrighted property and not intended for mass marketing.Thank you, & have fun crafting!